Jupyter (Open OnDemand)
Overview
This guide provides step-by-step instructions for launching interactive Jupyter Notebook / JupyterLab sessions on the High-Performance Computing (HPC) cluster using the Open OnDemand web portal.
Step 1: Navigate to Jupyter Application
On the top navigation bar, click on Interactive Apps.
Select Jupyter Notebook (or JupyterLab) from the drop-down menu.
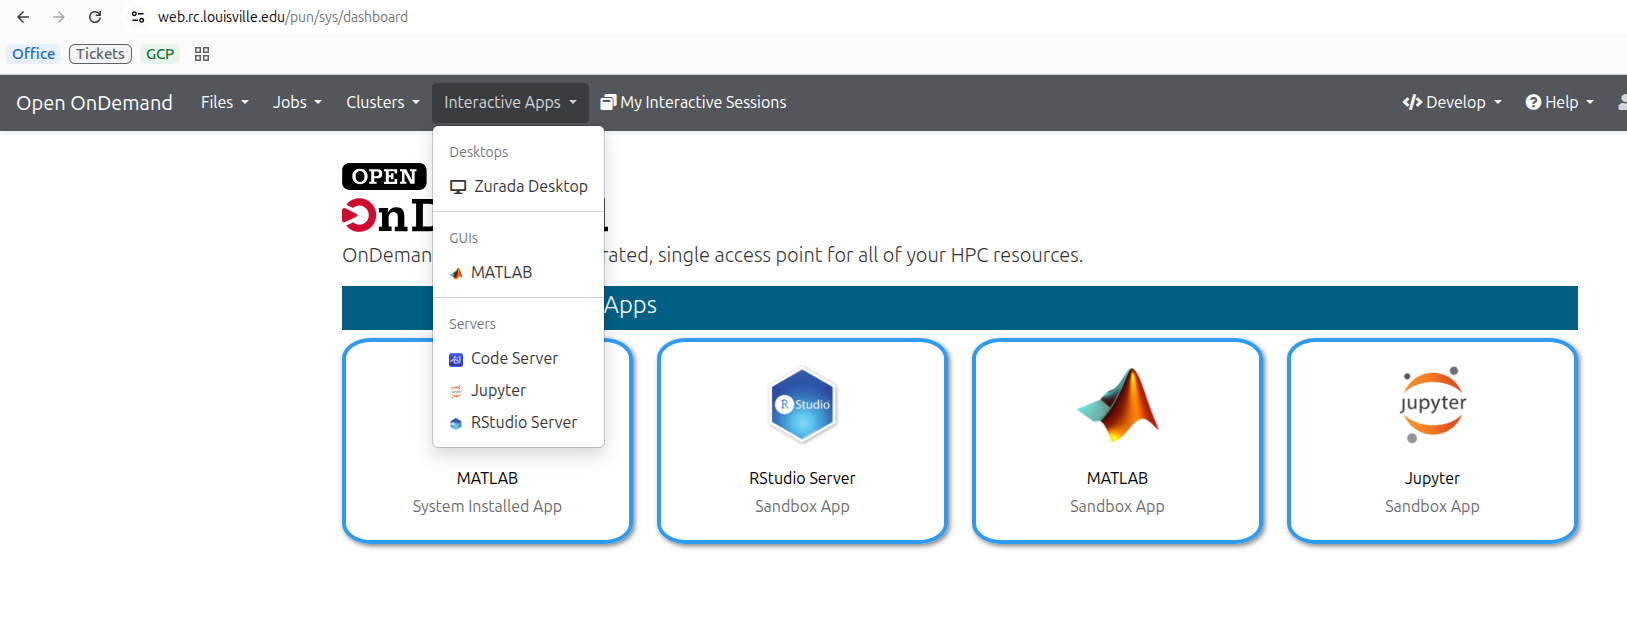
Figure 1: Selecting Jupyter Notebook from the Interactive Apps menu.
Step 2: Configure Job Options
Fill in the form parameters according to your resource requirements:
Parameter |
Description |
|---|---|
Job Name |
A custom identifier for your session (e.g., |
Project / Account |
Your Ulink id. |
Partition |
Choose the compute partition. |
Number of Hours |
Total runtime requested for the interactive session. |
Number of Cores |
Number of CPU cores requested for computation. |
Working Directory |
Starting directory for your Jupyter workspace. Defaults to |
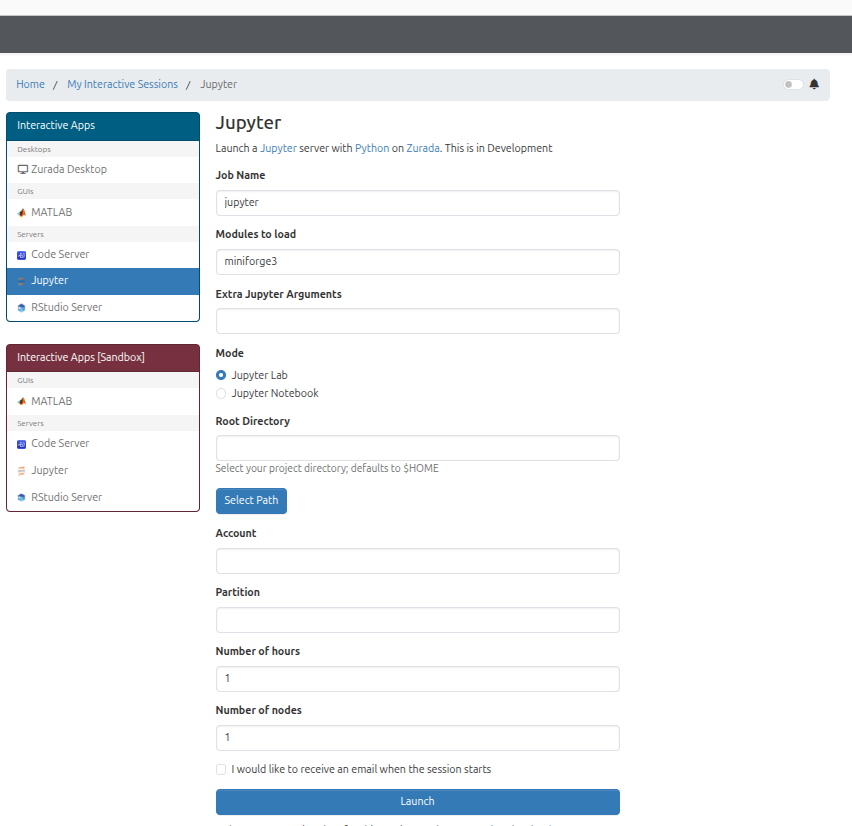
Figure 2: Interactive session submission form.
Click the Launch button at the bottom of the page.
Step 3: Connect to the Running Session
After clicking Launch, you will be redirected to the Interactive Sessions card view.
The session card will initially display Queued or Starting.
Once resources are allocated, the status will change to Running.
Click the blue Connect to Jupyter button to open the notebook environment in a new tab.
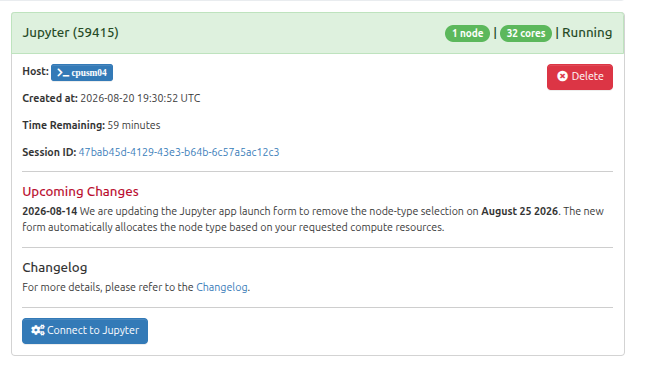
Figure 3: Active session card displaying the “Connect to Jupyter” button.
Step 4: Terminate the Session
When you have finished your work, close your interactive session to release compute resources for other users:
Return to the Open OnDemand Interactive Sessions page.
Click the red Delete button on the session card.
Figure 4: Deleting an active interactive session.
Troubleshooting
Session Fails to Submit: Verify that your account has authorization for the selected partition (especially high-memory options like
cpu1500g).Connection Timeout: Ensure your browser is not blocking pop-up windows from the portal URL.