Zurada Desktop (Open OnDemand)
Overview
Use Zurada Desktop through the OOD Interactive Apps interface when desktop sessions are available. Interactive desktop sessions are useful for graphical applications and desktop-style workflows.
Step 1: Navigate to Zurada Desktop
On the top navigation bar, click on Interactive Apps.
Select Zurada Desktop from the drop-down menu (if available).
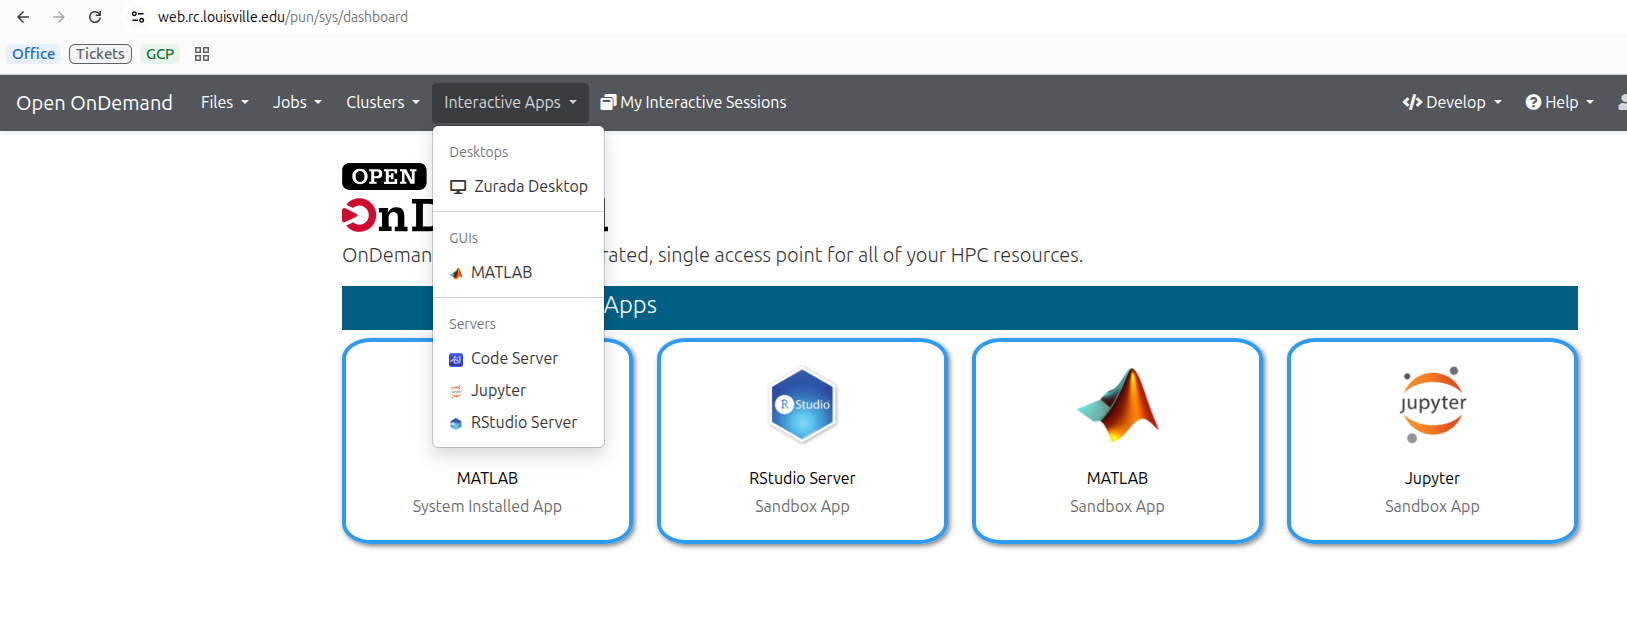
Figure 1: Selecting Zurada Desktop from the Interactive Apps menu.
Step 2: Configure Job Options
Fill in the form parameters according to your resource requirements:
Parameter |
Description |
|---|---|
Account |
Your ulink id. |
Number of Hours |
Total runtime requested for the interactive session. |
Number of Nodes |
Number of nodes requested. |
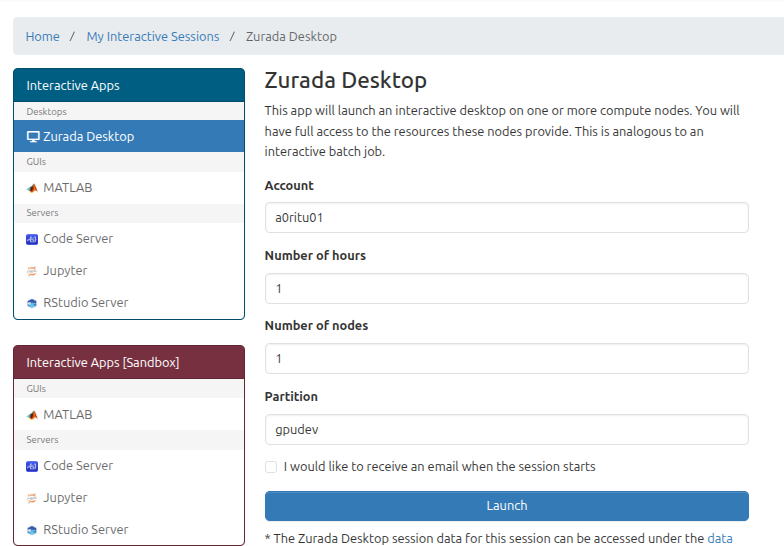
Figure 2: Interactive session submission form.
Step 3: Connect to the Running Session
After clicking Launch, you will be redirected to the Interactive Sessions card view.
The session card will initially display Queued or Starting.
Once resources are allocated, the status will change to Running.
Click the blue Connect button to open the Zurada Desktop environment in a new tab.
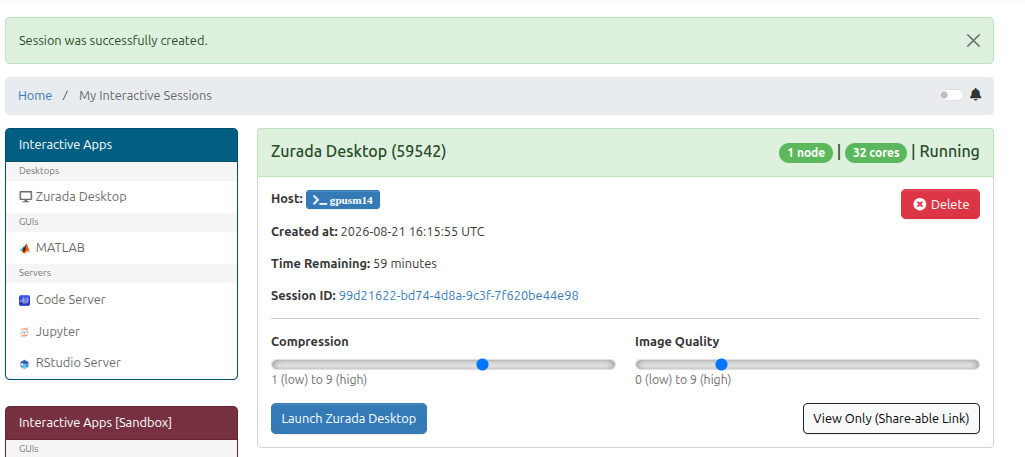
Figure 3: Example Zurada Desktop session card in Interactive Sessions.
Step 4: Terminate the Session
When you have finished your work, close your interactive session to release compute resources for other users:
Return to the Open OnDemand Interactive Sessions page.
Click the red Delete button on the session card.
Figure 4: Deleting an active interactive session.